Aller au contenu

7 WordPress Debugging Tools for Troubleshooting
-
Performance -
WordPress
Geekflare is supported by our audience. We may earn affiliate commissions from buying links on this site.

Even though WordPress is a controlled environment, where errors are much less frequent than in a typical software development setting, there is always a window or a door through which problems can crawl in.
As a general rule, it can be said that the more flexibility a tool gives you, the more potential errors you can encounter.
In the particular case of WordPress, there’s plenty of flexibility, and therefore, plenty of potential errors. You have an open plugin architecture you can use to add features to the CMS; you have a web server, a hosting provider, a database management system, and a network. All of these components are independent factors that contribute to their share of potential problems.
The kinds of problems you can encounter include slow performance, incorrect or damaged content, error messages, and, worst of all: the white screen of death (WSoD), which means your website has crashed and requires immediate attention.
Even a slight performance issue — such as a delay of fewer than 2 seconds — is something you should be concerned about because it could (and will) damage your SEO strategy and your positioning in search engine results. And that translates directly in less and fewer visitors every day, because these days, a quick response is everything, especially for mobile users.
That’s why it is crucial to have tools that you could use whenever you feel your website is not working correctly. And even if it does, there’s always room to improve its performance or its usability.

Debugging is task developers carry out to detect and remove errors (also called bugs) from their programs. It is done with the aid of specialized tools that let you see what’s going on inside a program while it is executing.
Sometimes the hardest part of the debugging job is to figure out the precise component, command, or instruction that is causing an error. To do this, developers do the same as a doctor who has to make a diagnosis: analyze the symptoms and, if necessary, carry out some studies to identify the source of the problem. The software development equivalent of medical studies is monitoring tools that provide information about a website’s inner workings.
Let’s see some options.
WP_DEBUG
WordPress has a built-in debugging aid that is commonly overlooked. It is a “flag” called WP_DEBUG that triggers the debug mode in WordPress whenever it is activated. When you activate WP_DEBUG, a log is generated that records all of your website’s activity. By reading this log, you may find out what is not working correctly on your WordPress website.
To turn on WP_DEBUG, you need to do some coding, by editing your wp-config.php file and adding the necessary lines to command your website to record all activity in the log. This coding task is not for everyone: you need to be very careful when editing the wp-config.php file, because if you misplace a line or even a character, your website may stop working. Also, make a backup of your site/files before doing anything. If you mess things up, you can restore the backup and roll everything back to normal.
To edit the wp-config.php file, use the file manager of your hosting provider or use an FTP client to download the file and open it locally with your preferred text editor. The file is located on the main directory of your WordPress installation. After you open it, locate the line where WP_DEBUG is defined. It should look like this:
define( 'WP_DEBUG', false );If there is no such line, search for the following comment:
/* That’s all, stop editing! Happy blogging. */and add the following lines above that comment. These commands will instruct your site to log all errors without displaying them, which is useful for websites that are publicly available:
define('WP_DEBUG', true);
define('WP_DEBUG_LOG', true);
define('WP_DEBUG_DISPLAY', false);
@ini_set('display_errors',0);
Save the modified file, and if you are using FTP, upload it to your site. Then try to provoke the error (or wait until it happens) and check the file debug.log. You will find it in the wp-content folder of your WordPress installation. You can open it with a text editor and look for the error messages that reveal what is causing problems to your website.
After doing this, you should turn off logging by changing the values “true” to “false” in all the lines you added or changed in the wp-config.php file.
WPDB Error Reporting
If you know or suspect that your website’s database is causing problems, you can enable WPDB Error Reporting. This also requires some coding. Once you enable error reporting, you can instruct your website to begin displaying database errors on the screen.
You shouldn’t do this on a live website unless you don’t care if your visitors get error messages on their screens. It’s better to use a staging website (as described below) where you can test everything you want without letting everyone see what’s happening under the hood.
Reading these error reports or logs requires some technical knowledge, just as it takes medical knowledge to read an x-ray, for instance. You will have to decipher some programming, networking, or database jargon, but you probably find the root problem that is affecting your website, and then get help from someone that could solve that specific problem.
To begin generating database error reports, add the following line to your wp-config.php file (in the same way as explained before to generate the debugging log):
define( 'SAVEQUERIES', true);By setting this value to true, the database will begin storing all queries your website makes. Then you will be able to inspect the number of queries caused by each page request and the commands used in each one. One way to show the queries on-screen is adding these lines in your theme PHP file within your flow of execution:
global $wpdb;
print_r( $wpdb->queries );
Once you are done with the debugging, you should remove these lines to restore your website back to its normal operation.
Using a staging website
A staging website is a clone of your actual website, where you can test changes or new features before going live with them. It is also a good idea to use a staging website to debug problems or monitor its behavior because it gives you the freedom to try out everything you want without interfering with the actual users of your website.
It is important that a staging website reflects exactly the content and structure of your actual website. Whenever you update your WordPress site with new content or new addons (mostly plugins and themes), you should refresh your staging site with a copy of the actual one. This way, if a problem occurs on your live website, you will be able to replicate it on your staging environment.
Many managed WordPress hosting providers offer a staging site as an added value to their paid plans. This is the most user-friendly way to have a staging environment where you can play and try things out without risk. But if your hosting provider doesn’t offer you this possibility, you could create a staging site using the WP Staging plugin. This plugin makes it easy to clone your website and then use the clone as if it was the real thing. You will always know when you’re in the staging environment because an orange bar on the top of the screen will tell you so.
If you enjoy getting your hands dirty, you can always create a staging site manually on a subdomain, assuming your hosting provider lets you add a subdomain to your account. The process of creating the staging site this way can be a little tricky, so if you are a WordPress beginner, you may want to use another option.
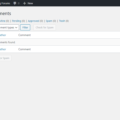
Query Monitor
Its name could be misleading because Query Monitor does much more than just monitor queries. It is a complete developer panel for WordPress, enabling the debug of scripts, stylesheets, API calls, database queries, PHP errors, and more. Some advanced features let you debug Ajax calls and do user capability checks.

Once you install and activate it, Query Monitor begins showing information about your website’s behavior in the most useful ways.
For example, it shows aggregate database queries grouped by the functions, plugins, or themes that fired them. An admin toolbar menu shows live stats of the current page, with all the debug information you might need to assess the problem you need to solve.
By using Query Monitor, you can narrow your search progressively for bugs by plugin or theme, until you find the one that’s degrading the performance of your website or causing a malfunction. Just like WordPress, Query Monitor is completely free and open-source.
Firefox Developer Tools
Previously known as Firebug, Firefox Developer Tools is a special version of Firefox tailored for developers, offering the latest development features and tools. It is not specific for WordPress, but it turns out to be very useful for debugging websites.
It is inevitable to compare Firefox Developer Tools with the more popular Chrome DevTools. When doing so, Firefox’s solid layout stands out. For instance, you can right-click any element to pull up the inspector tab, and the web console offers rich output when printing objects, showing a lot more information than just its name. It provides extra information for certain types, enabling a detailed examination of the object’s properties and providing richer information for DOM elements.
With the Inspector tool, you can examine and modify page HTML and CSS, letting you do that with pages loaded locally on Firefox or on a remote device, like Firefox for Android.
The Web Console shows all the information you might need about a webpage: JavaScript, network requests, CSS, warnings, error messages, and informational messages explicitly logged by JavaScript code. It also enables you to interact with a web page by directly executing JavaScript expressions in the page context.
New Relic
As one of the largest players in the APM (Application Performance Monitoring) industry, New Relic is a commercial product that thousands of developers worldwide use on a daily basis to get performance insights about their software products. It has a plugin architecture that allows for added functionality by third parties, resulting in a virtually endless spectrum of technologies that can be monitored by this tool.

With a price range from $ 9.37 to $ 200 per host per month, it is intended for professional debugging tasks. It also carries an extended learning curve, so besides spending money on the solution, you also need to invest time to learn to use it. Users of New Relic appreciate the fact that it is easily integrated into applications for APM and infrastructure monitoring.
Kinsta lets you integrate New Relic easily from their MyKinsta dashboard.
Debug Bar
Debug Bar is a set of plugins accessible through a debug menu on the WordPress admin bar, which shows a wide variety of debugging information. Its options include the console, shortcodes, constants, post types, cron, actions & filters, transients, remote requests, and list scripts & style dependencies. It is an open-source plugin, so it can be used for free.
The main plugin, Debug Bar, provides the base functionality, extended by the rest of the plugins. It works with the built-in debugging flags offered by WordPress, such as WP_DEBUG and SAVEQUERIES. When these flags are active, Debug Bar adds useful debugging information, such as PHP warnings and MySQL queries, saving you the trouble of looking for and reading the log files.
Each option in the Debug Bar menu provides its share of debugging power. The console, for example, provides a console in which you can run arbitrary PHP code, which is excellent for testing the content of variables (among other uses). Cron displays information about WordPress’s scheduled events, such as time of next event, the number of scheduled events, the list of custom scheduled events, etc. Actions and Filters are another option to display hooks attached to the current request. The Actions tab shows the actions hooked to the current request, while the Filters tab shows all filter tags, together with the functions attached to each one.
Debugging for all
Debugging tools are mostly designed for software development professionals. But even if you are not a developer, if you just maintain a WordPress blog, it is useful to have at least a basic knowledge of how to monitor and debug your site. By doing so, you can give a developer some information that will help him or her to find the source of a problem, in the same away, that, if you feel bad, you can save your doctor some work by taking your temperature by yourself before going to the hospital.
Thanks to our sponsors.


More Great Reading on Geekflare


Articles similaires: